Description:
This help guide explains how to enable and manage self check-in settings for your healthcare location. It’s useful when you want patients to check in before their appointments without staff assistance. You’ll learn how to activate self check-in, set time windows, enable the ACC45 form, and save changes. By following these steps, you can also download and display a QR code to make self check-in accessible at your practice.
Video Demo:
Steps:
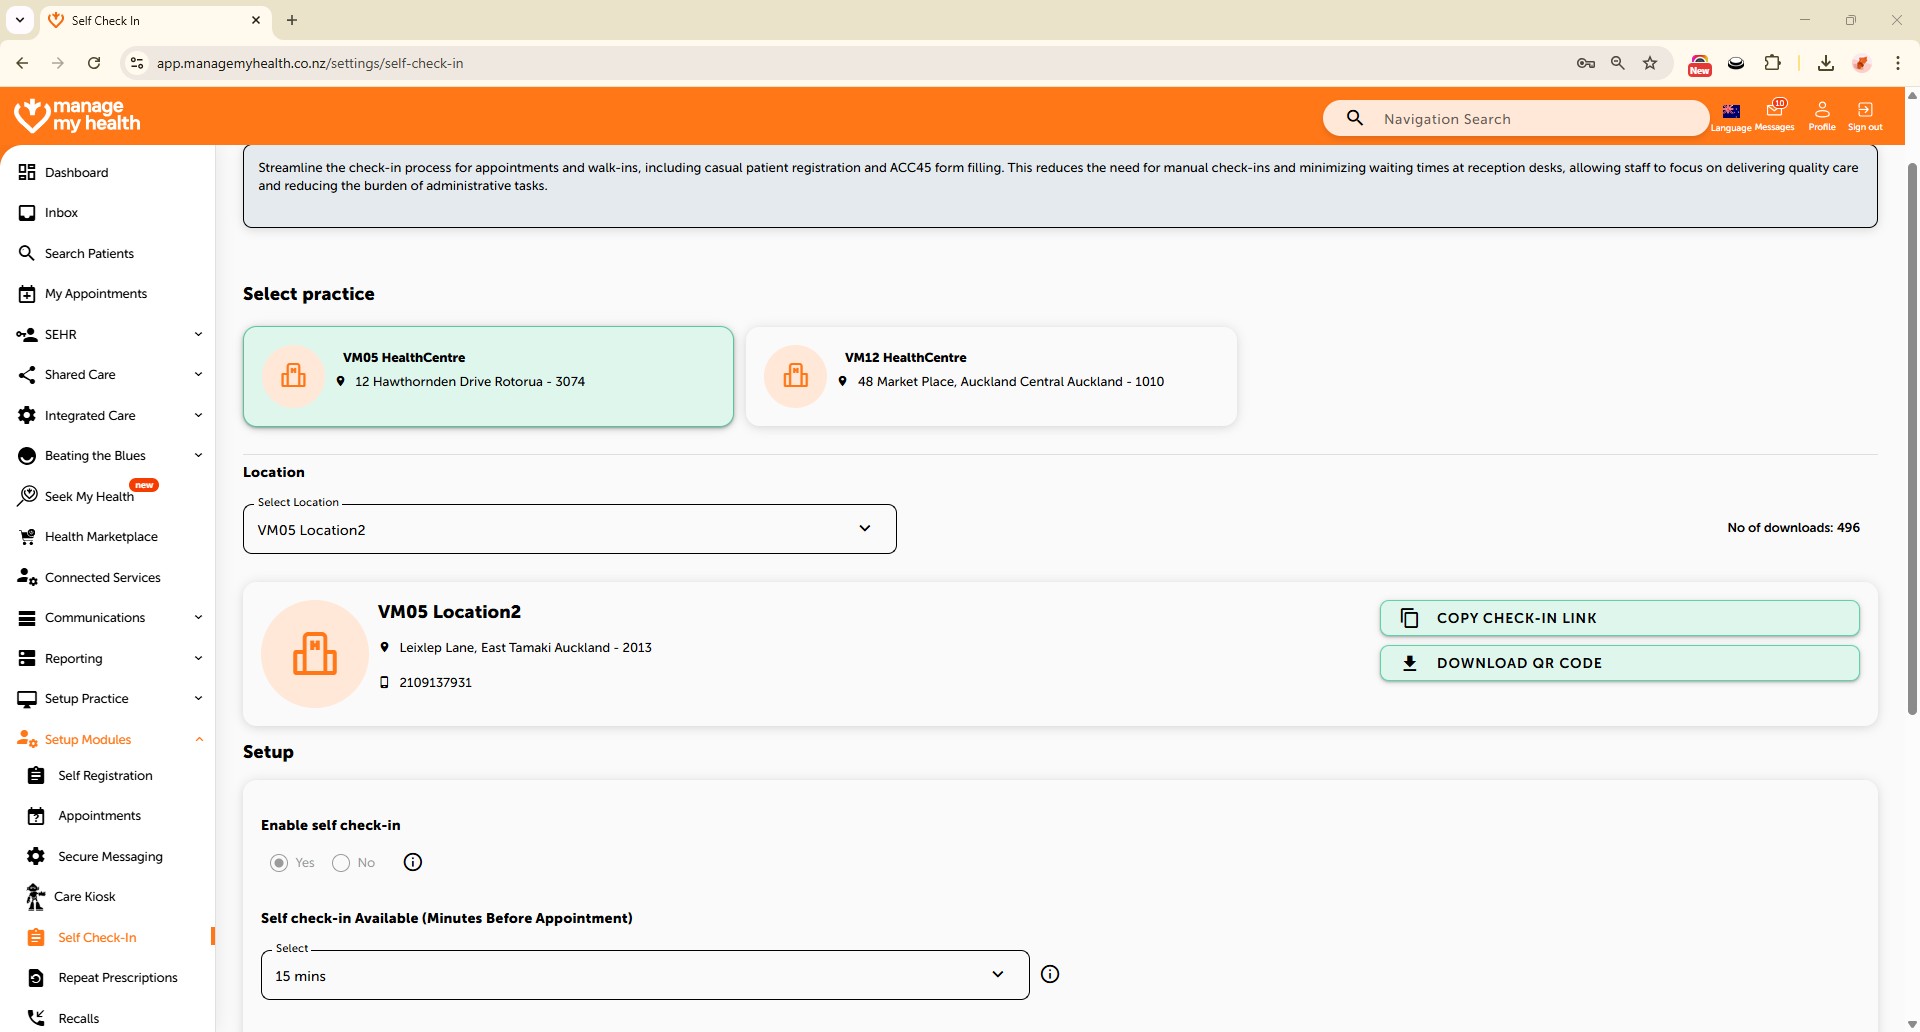
- Open the “Setup Modules” section from the sidebar.
- Navigate to “Self Check-In” and click Edit.
- Set Enable Self Check-In to Yes.
- Choose the time window before appointments when patients can check in.
- Enable the ACC45 form to allow form completion during self check-in.
- Select the relevant time period, then click Save.
- Once updated successfully, download the QR code and display it at the practice to promote self check-in.