Description:
This help guide explains how to configure repeat prescriptions so requests are restricted to named providers at each location. It’s useful when you want to control which providers handle prescriptions across different sites. You’ll learn how to update service descriptions, enable collection and pharmacy delivery, and set fees. By following these steps, you can maintain clear responsibilities and streamline repeat prescription processing.
Video Demo:
Steps:
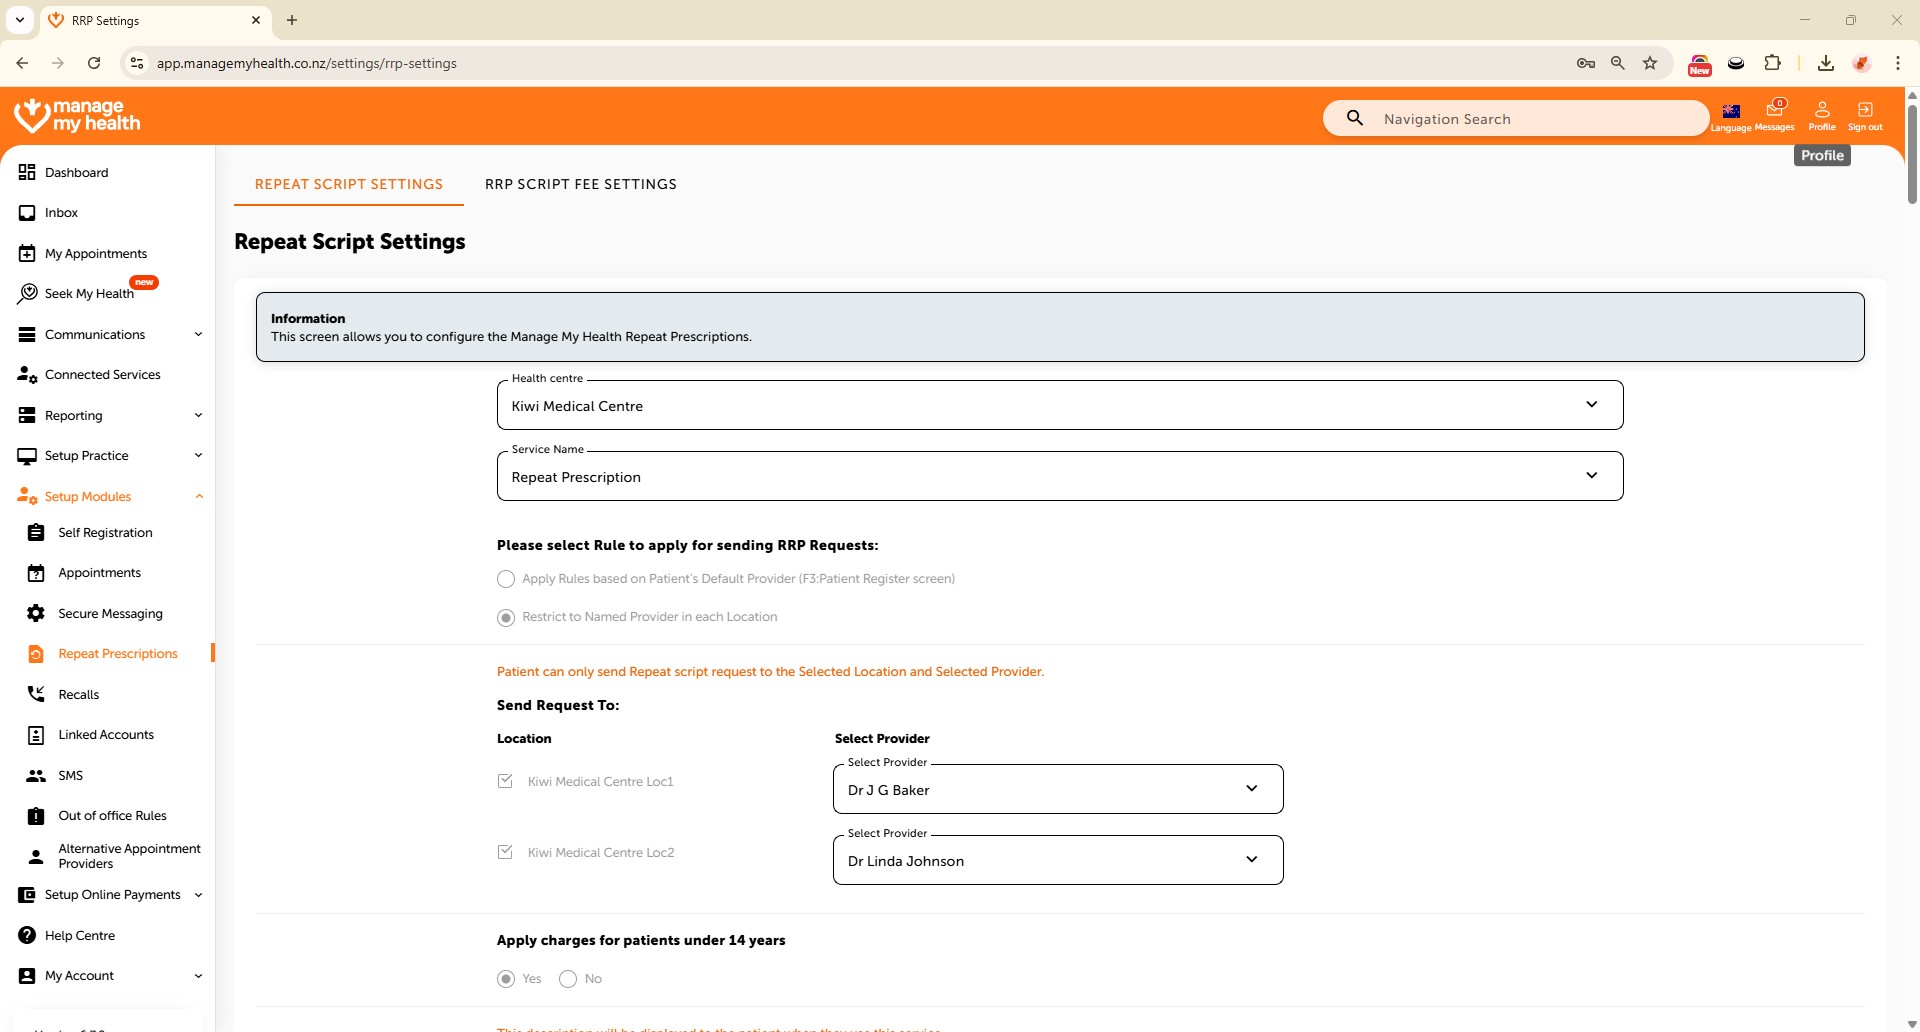
- Go to “Setup Modules” and select “Repeat Prescriptions”, then click “EDIT” to modify the settings.
- Enable “Restrict to Named Provider in each Location” to route repeat prescription requests to designated providers per site
- Update the Description field to explain the service, enable “Patient to Collect Script”, and make “Reason for repeat script” mandatory.
- Enter fees for urgent/same-day and 48-hour prescription services for:
- Standard patients
- Community Services Card holders
- High Use Health Card holders
- Add a message to appear in the patient’s email once a script is processed. Review the email layout to confirm its placement.
- Turn on “Send script to pharmacy” so patients can select a preferred pharmacy.
- Allow both “Pay at Health Centre” and “Pay Online” as payment methods.
- Click “SAVE” to apply and confirm the changes. A message will confirm successful setup.
- Go to “Setup Online Payments”> “Payments”.
- If no merchant account exists, complete the Windcave form and contact [email protected].
- If a merchant account exists, proceed to “Online Payment Settings”, click “EDIT”, and enable online payments for repeat prescriptions.
- Add Terms and Conditions, click “SAVE”, and confirm online payment setup. Patients will now see the “Pay Online” option.